Hummus really is pretty simple to make. Although I am a fanatic and expend a shocking amount of mental energy on thoughts of hummus, you are, in all likelihood, not. Don't complicate things at the jeopardy of your own enjoyment of the process. It's actually very hard to make bad hummus.
If it's your first go at making hummus, try my easy hummus recipe!
passive prep time: ~14-24 hrs
cook time: ~1-2 hrs
active prep time: 30 mins
The first step to a great batch of hummus are the chickpeas. Look, canned chickpeas are fine in a pinch. Any hummus is better than no hummus. The result of a batch made from a can will be far superior (and cheaper) than anything you'll find in the supermarket. But, for great hummus, there is no alternative: you need to start with dried chickpeas.
I've experimented with various sizes. Many sources will say that you should use the smallest chickpeas possible. This is true. You'll get noticeably smoother hummus from small chickpeas. I theorize that this is a result of the decreased cook time required.
The difference between small and large chickpeas is quite small. Where I live, there is thankfully an excellent middle eastern grocery that stocks the smaller variety of chickpea. If you live in NYC, Kalustyans blessedly stocks an absurd variety of radii. But chances are you'll have to go with the so-called "Garbanzo" beans stocked at many supermarkets. Don't fret too much.
You'll need to soak the chickpeas before cooking them. Rinse the chickpease and add enough water to cover them with a couple inches. You've probably heard that is important to add baking soda to help soften the beans. Again, this is good wisdom. Add a good amount to the soaking water: I usually go with a full Tbsp.
I've had good success soaking anywhere from 8-24 hours. After soaking, rinse the beans again and add to a pot to cook. Cover the chickpeas again and add a little more baking soda (somewhere under 1 tsp). Too much baking soda in the cooking water will impact the taste of that water, which is not good since you'll want to use that water later on to thin the hummus to your desired cosistency.
The cook time varies quite a bit depending on the size and age of your beans. You'll need to use your own judgment to determine when they're done, but expect anywhere from 30 minutes to 2 hours. If it is taking exceptionally long, it is probably due to a deficit of baking soda.
If you're lucky, the skins will detach after a short while of boiling at which point you should scoop them from the surface and discard them. This will make a HUGE difference in the texture of the hummus and, to some extent, the taste. I think hummus made without skins is truly indulgent, but you will get a substanitally bigger batch with, presumably, far greater fiber content if you leave the skins. And of course, it will also cost you far less effort to leave the membranes on the chickpeas. While you will rarely hear of someone seeking grit in their hummus, I actually sometimes leave the skins on to add a little texture.
When the chickpeas are done cooking, they should be almost mushy. If you cook them too long they will darken and your hummus will lose some visual appeal, but don't worry too much- it will still taste great. In fact, hummus from "overcooked" chickpeas reminds me of one of the greatest Hummusias I visited (repeatedly) in Tel Aviv: Abu Adham. If you're willing to accept the discoloration of a prolonged cooking process, you can use another fun cooking hack: the slow cooker. Put soaked chickpeas on high for basically as long as you want (4-10 hours) and you'll have a usable, albeit unphotogenic, mush.
This produces a sauce that is light on citrus, and heavy on garlic and tahini flavor. What I like about making this sauce separate is that you can isolate the variables that you want to adjust when personalizing your hummus. For me, this means relatively little lemon. It's fine to start with any one recipe, but you WILL want to make adjustments to the ratios of these ingredients. You will probably want more lemon. Most hummus I've tried is a little citrusy for my taste, which must mean the common palette prefers their hummus brighter than myself.
Add some chickpeas to the food processor and pour in some of the tahini mixture You may need to process the hummus in batches. If you skinned the chickpeas, it will take less batching due to the lower overall volume. I prefer to start with a relatively dry batch and make it thinner as I go. This makes the last batch easy to extract cleanly from the food processor (again with little, if any, need to scrape). Add more cooking water as you like to each batch to achieve the desired consistency. Process each batch longer than appears to be necessary. I like to run the processor for 5-7 minutes each batch.
The hummus will thicken considerably upon cooling, so it is wise to save the remaining cooking liquid for adjusting the texture later. You can cool the chickpeas to fridge temperature before processing, which will make the cooking water a gel like consistency. Doing so will give you a better idea what the final cooled product will be like. You can also speed up the cooling process by processing some ice with each batch of hummus.
Do not be discouraged at the amount of time you spend making hummus the first time. It is surprising how much more efficient you will get with each successive batch. :)
Hummus needs to be refrigerated to prevent spoilage. I've never had issues keeping hummus for 5 days. More than that and you may notice some deteriation in flavor, and I wouldn't advise trying to keep it more than a week.
Absolutely, do not listen to anyone who suggests that "real" hummus is best served fresh and warm. While it may be novel from time to time, in my experience it is best after being cooled for at least 12 hours. This is true with almost all Levantine dips: baba ganouj, muhamara, etc. As well as so many other foods: salsas, chili, etc. It's certainly worth trying hummus "fresh", but the flavors are noticeably more subtle.
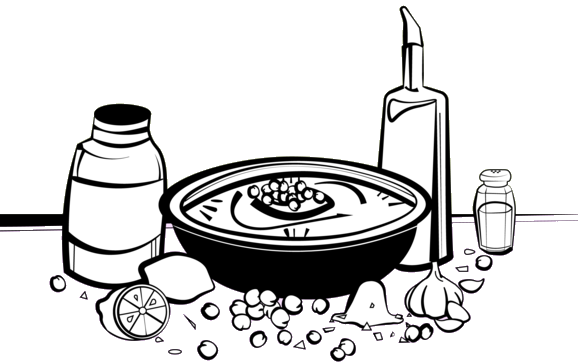
There are 3 main ways to put your personal stamp on your hummus. I've mentioned two: the tahini/citrus/garlic ratio and the consistency. The third is presentation. This is the most fun part of the process in my opinion. I like to make a couple extra cups of chickpeas to keep for garnishing. Make a small basin in the hummus and fill the indentation with a scoop of warm chickpeas. Around the chickpeas, drizzle some olive oil and sprinkle the dish with cumin and Hungarian paprika (regular paprika is fine too, I just like the bright color of Hungarian). The way that every Hummusia in Israel (a place unparalleled in hummus culture) presents their hummus is what defines them. It is a very simple dish, so to make a truly memorable hummus is an art that inspires all the senses including sight.
Some other additions to try serving on your hummus:
In Israel, ful, tahini sauce, and chickpeas are mostly standard options (very few hummus joints will not offer them). And olive oil, parsley, and a generous array of spices are a default part of the presentation. One of the best bowls of hummus I had in Tel Aviv (from a falafel joint called Mifgash Osher) was topped with fried cauliflower. Have fun and be as creative or traditional as you like!